
Creating our first repository on GitHub
Creating our first repository on GitHub
We have already worked a lot with Git locally, we have seen how to create repositories, how to create commits, how to work with branches, how to recover files…
But, how can I work with other people?, how do I share that great project that I just finished and I want more people to see it?, or the solution to that problem that half the world is encountering?
For that, we have GitHub!
What is GitHub?
Well, basically GitHub is a website where you can have your Git repositories, but not just any website, but the website par excellence with more than 20 million users according to data from April 2017, and with more than 57 million repositories.
Not bad, right?
So let’s see how to create our first repository on GitHub. The first thing we must do if we haven’t already is to create a GitHub account.
Creating our repository
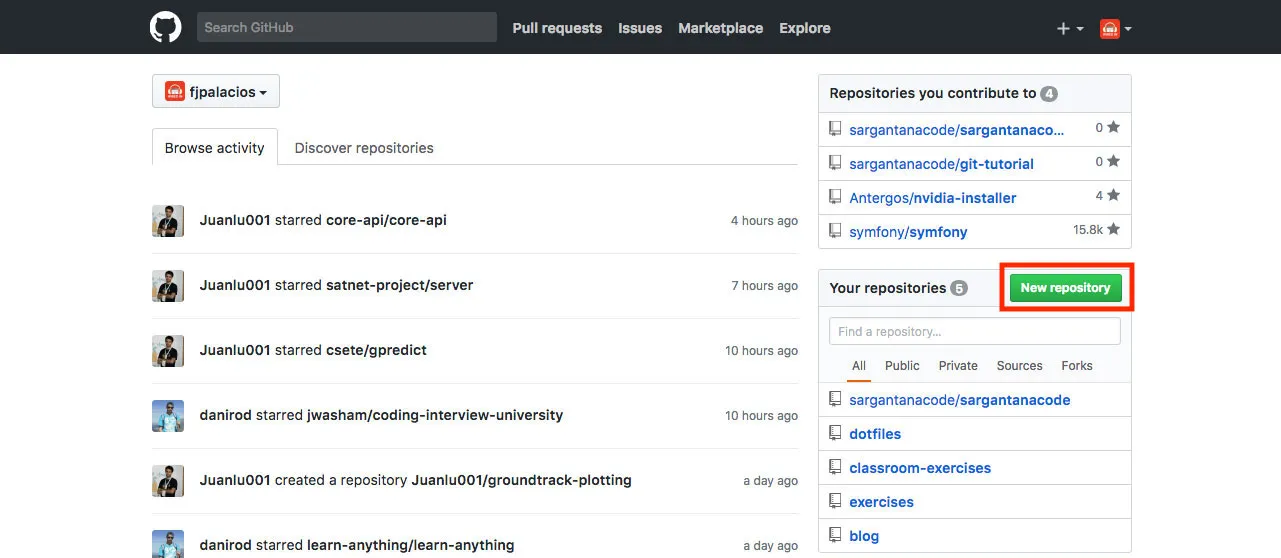
Once we have logged into our GitHub account, we will see the Dashboard, which is the main page of GitHub, like that of any other social network, where we can see the activity of the people we follow or the repositories we have subscribed to.
But well, let’s get to what interests us, creating our first repository. To do this, in the upper right corner we will see our avatar, and next to it a + symbol, click on it and then New repository.
After that it will take us to the following page:
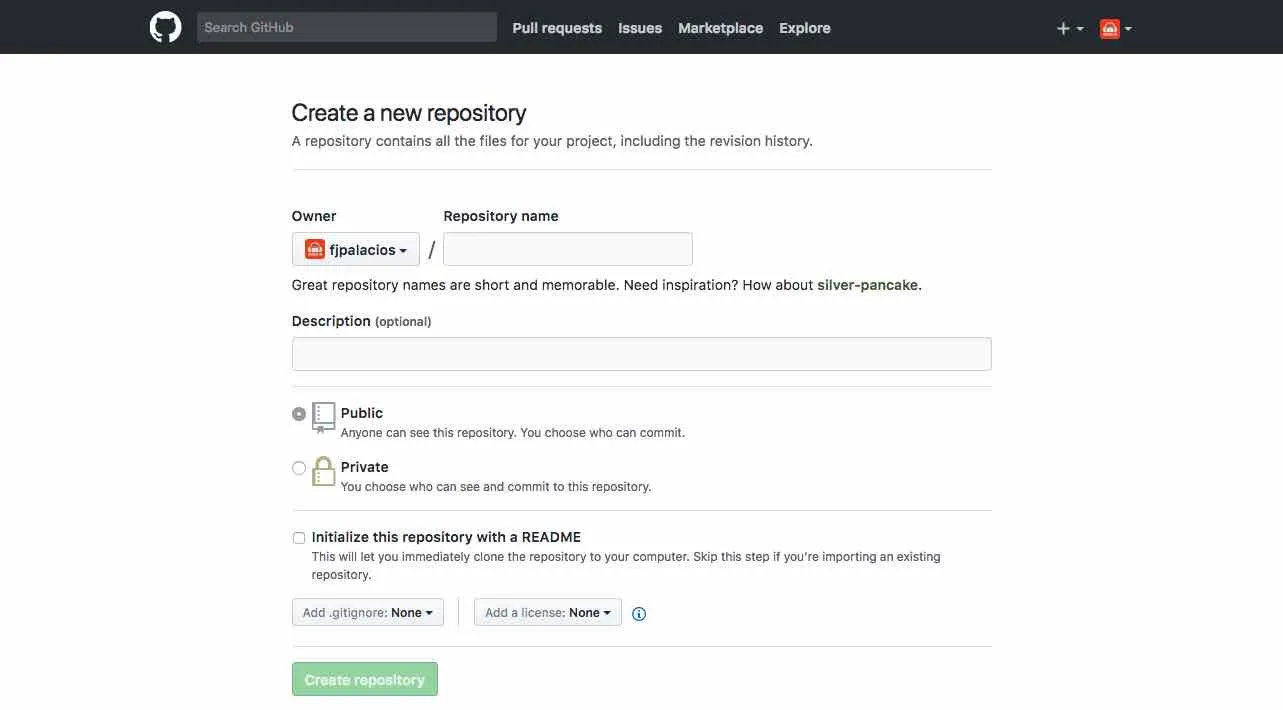
As we can see, we have several fields to fill in, below I will explain what each of them is for:
- Repository name: the name of our repository, it is something that we must fill in yes or yes, without that field it will not allow us to create the repository.
- Description: a description of what our project consists of, it is not mandatory to fill it in.
- Public/Private: do we want our repository to be public for everyone or private only for us (or people we invite)? It is paid to be able to have private repositories.
- Initialize this repository with a README: do we want a README file to be automatically created when the repository is created (which is the one we will use to describe what the project is about)?
- Add .gitignore: do we want to add a .gitignore file? We can choose what language we are going to use in the project to add a standard .gitignore file of the language/framework we want (we can modify it later).
- Add a license: do we want to add a license to our project? We can choose from the most popular ones.
We fill in the Repository name field, choose whether we want the repository to be public or private, check the Initialize this repository with a README checkbox and click on Create repository.
After a few seconds it will take us to our repository page:
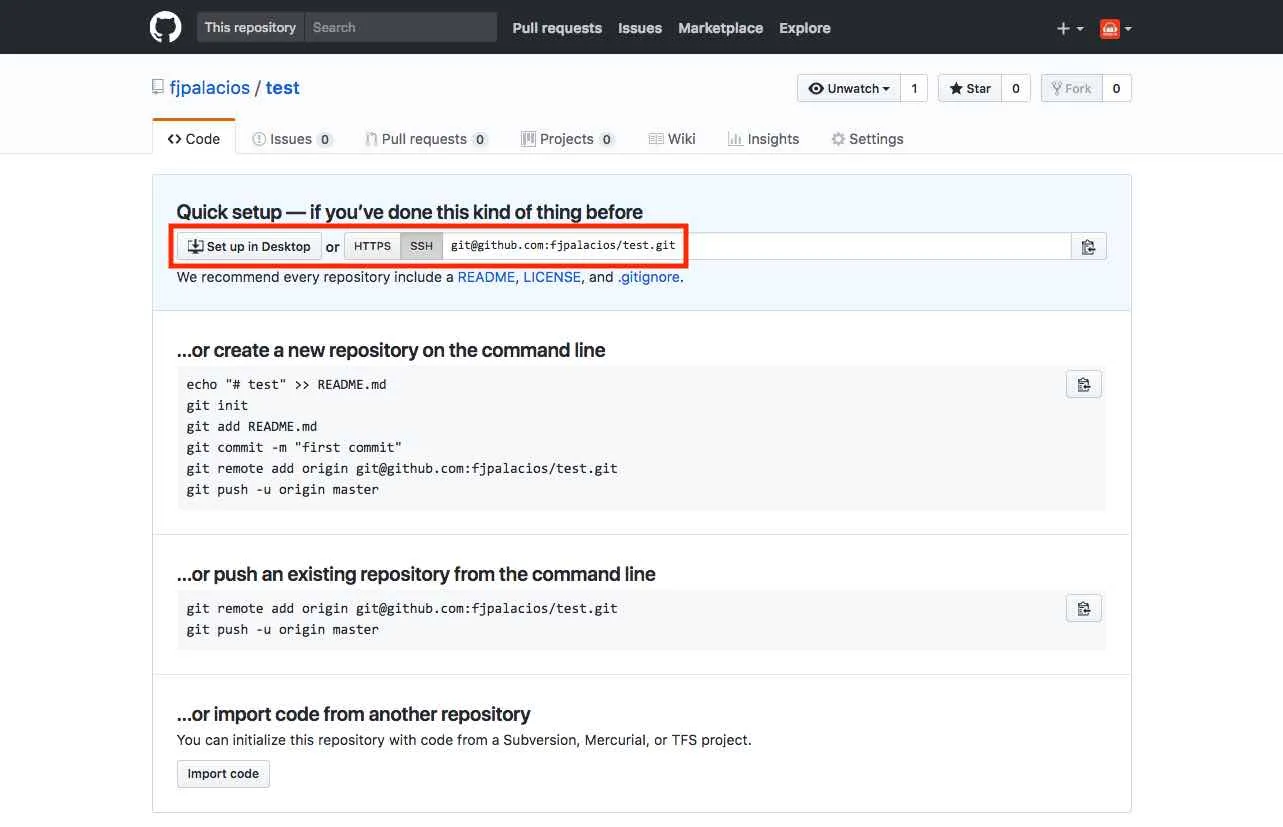
This is where we can see everything related to our project.
At first we will see several things, such as the README.md file that we have created (which is the one we see below the files), and the .gitignore if we have created it too.
Also, if we click on 1 commit, we can see the only commit we have so far, which is the initialization of the two files:
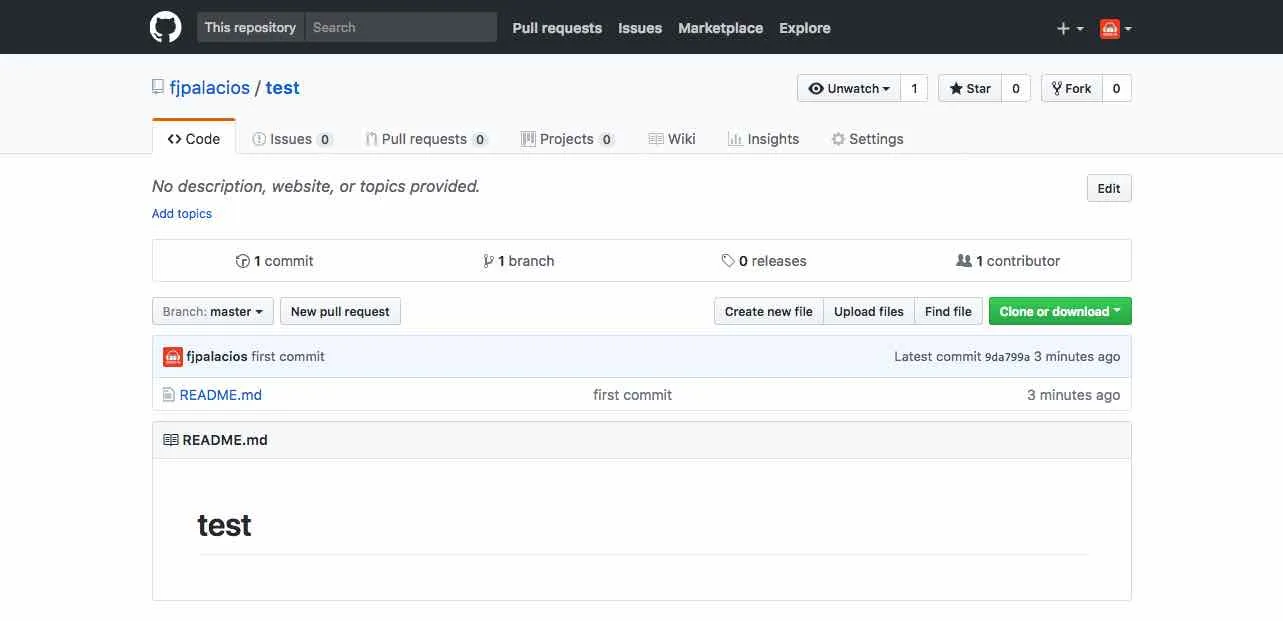
As you can see, GitHub repositories also have branches, in the previous screenshot we can see that the master branch is shown, which is the one we have by default.
Conclusion
We have already seen how easy it is to create a repository on GitHub. In future tutorials we will see how to interact with it, how to download it to work locally, and a thousand more things.
Never stop programming!